Rook and Rook Pawns vs. Rook and Two Knights in Chess: Strategies and Tactics
Welcome to our article on the fascinating chess endgame scenario of Rook and Rook Pawns versus Rook and Two Knights. In this strategic battle, players with a rook and an extra pawn face off against opponents armed with two knights. The material imbalance presents unique challenges and requires careful planning and tactical execution.
In this section, we will explore various strategies and tactics that can help you navigate this intricate chess endgame. Whether you’re a beginner or an advanced player, understanding the principles guiding the evaluation and play of such positions is crucial for success. Let’s dive in and discover the secrets to mastering this engrossing chess situation!
Key Takeaways:
- Evaluate the material imbalance and understand the strengths and weaknesses of each side.
- Coordinate your pieces effectively to exploit the rook’s potential and disrupt the opponent’s piece activity.
- Consider creating passed pawns to put pressure on the opponent’s knights and force them to deal with the advancing pawns.
- Trade rooks strategically to disrupt the opponent’s piece coordination and create imbalances in the position.
- Keep an eye on key factors such as piece activity, coordination, and positional weaknesses to determine the best course of action.
Evaluating Rook and Rook Pawns vs. Rook and Two Knights Position
Players at different skill levels often struggle with evaluating the material imbalance of a rook and rook pawns versus a rook and two knights. This situation arises frequently in chess games, causing beginners, intermediate players, advanced players, and even masters to face challenges in assessing the position. It is crucial to understand the principles that guide the evaluation of such positions.
When evaluating the rook and rook pawns versus rook and two knights position, several factors come into play. The mobility and coordinated activity of the rook and knights, the strength and stability of the pawns, and potential threats from both sides must be analyzed. Additionally, the pawn structure and central control can significantly influence the outcome of the game.
To better evaluate this position, players should consider a few key points:
Control of Key Squares:
To assess the position accurately, players must focus on controlling key squares on the chessboard. The rook and rook pawns should aim to control and occupy central squares, limiting the knight’s mobility and creating potential outposts for the rook. On the other hand, the rook and two knights should strive to control important squares, aiming to restrict the rook’s activity and potentially exploit weaknesses in the opponent’s pawn structure.
King Safety:
The safety of the king is of utmost importance in chess. In this material imbalance, the side with the rook should ensure the king’s safety by castle early and avoiding potential mating threats. The side with the two knights, on the other hand, should be cautious about the king’s exposure and weaknesses in their pawn structure that could lead to the enemy rook infiltrating and causing havoc.
Evaluating the position accurately requires careful analysis and consideration of these factors. Understanding the principles that govern the evaluation process can guide players in making strategic decisions and determining the strength of their positions.
Table: Evaluating Rook and Rook Pawns vs. Rook and Two Knights Position
| Factors | Rook and Rook Pawns | Rook and Two Knights |
|---|---|---|
| Central Control | Can occupy central squares | Should aim to restrict central control |
| Pawn Structure | Strength and stability are crucial | Exploit weaknesses in the pawn structure |
| King Safety | Castle early and protect the king | Be cautious about king’s exposure |
| Activity of Pieces | Mobility of rook and coordinated pawns | Mobility of knights and coordination with rook |
Rook vs. Bishop and Knight: Key Factors and Strategies
The combination of a rook against a bishop and knight can be a challenging material imbalance. Both sides have their advantages and strategies to consider. The rook’s potential in openings and middlegames is limited, but it can excel in endgames. Mikhail Tal, a former world champion, was known for his skill in playing with the rook in such positions. Maintaining piece activity and coordination is crucial for the side with the minor pieces.
The bishop and knight combination has its strengths as well. The bishop’s long-range mobility and the knight’s ability to hop over pieces make them formidable attackers. They can create threats in both tactical and strategic aspects of the game. However, it is important to be mindful of their limitations. The bishop’s restricted mobility in closed positions and the knight’s vulnerability to being trapped are factors that need to be considered.
Key Factors and Considerations
When playing with the rook, it is essential to exploit its strengths and compensate for its weaknesses. Here are some key factors and considerations to keep in mind:
| Strengths of the Rook | Weaknesses of the Rook |
|---|---|
| – Long-range mobility | – Vulnerability to tactics and forks |
| – Power to control open files and ranks | – Limited maneuverability in closed positions |
| – Ability to support passed pawns | – Difficulty to defend against coordinated minor pieces |
Understanding these factors can guide your decision-making process and help you formulate effective strategies in rook versus bishop and knight endgames. It is crucial to maintain piece activity, coordinate your forces, and exploit tactical opportunities whenever possible. Strive to create favorable conditions for your rook while minimizing the strengths of the bishop and knight duo.
Strategies and Recommendations
Here are some strategies and recommendations to consider when facing a rook versus bishop and knight endgame:
- Exploit the rook’s strengths: Utilize the rook’s long-range mobility and control open files to restrict the opponent’s minor pieces.
- Restrict the bishop’s mobility: Aim to limit the bishop’s scope by creating closed positions and denying it access to active squares.
- Trap the knight: Look for opportunities to trap the opponent’s knight by restricting its escape squares and exploiting tactics.
- Coordinate your minor pieces: Coordinate your bishop and knight to create threats and put pressure on the opponent’s position.
- Focus on endgame techniques: Study and practice various endgame techniques, such as creating passed pawns and exploiting zugzwang situations.
By employing these strategies and considering the unique characteristics of the rook and the bishop and knight duo, you can improve your chances of success in rook versus bishop and knight endgames.
Rook vs. Two Bishops: Challenges and Strategies
When facing a rook and pawn against two bishops, the rook player must be aware of the challenges posed by the long-range capabilities of the bishops. The bishops can control distant corners of the board, making it difficult for the rook to maneuver.
To counter these challenges, the rook player should aim to trade one or both of the opponent’s bishops, as the two bishops working together can be a formidable force. By eliminating one or both of the bishops, the rook can reduce the opponent’s advantage in piece coordination.
In addition to trading bishops, the rook player should strive to create positional weaknesses and exploit potential outposts. Positional weaknesses, such as isolated pawns or weak squares, can provide targets for the rook to attack and ultimately gain an advantage. Similarly, outposts allow the rook to occupy strong squares on the board, limiting the mobility of the opponent’s pieces.
Table: Challenges and Strategies in Rook vs. Two Bishops
| Challenges | Strategies |
|---|---|
| Long-range capabilities of bishops | Trade one or both bishops |
| Bishops controlling distant corners of the board | Create positional weaknesses |
| Two bishops working together | Exploit potential outposts |
Successfully navigating a rook vs. two bishops endgame requires strategic thinking and careful planning. By employing these strategies, the rook player can level the playing field and increase their chances of a favorable outcome.
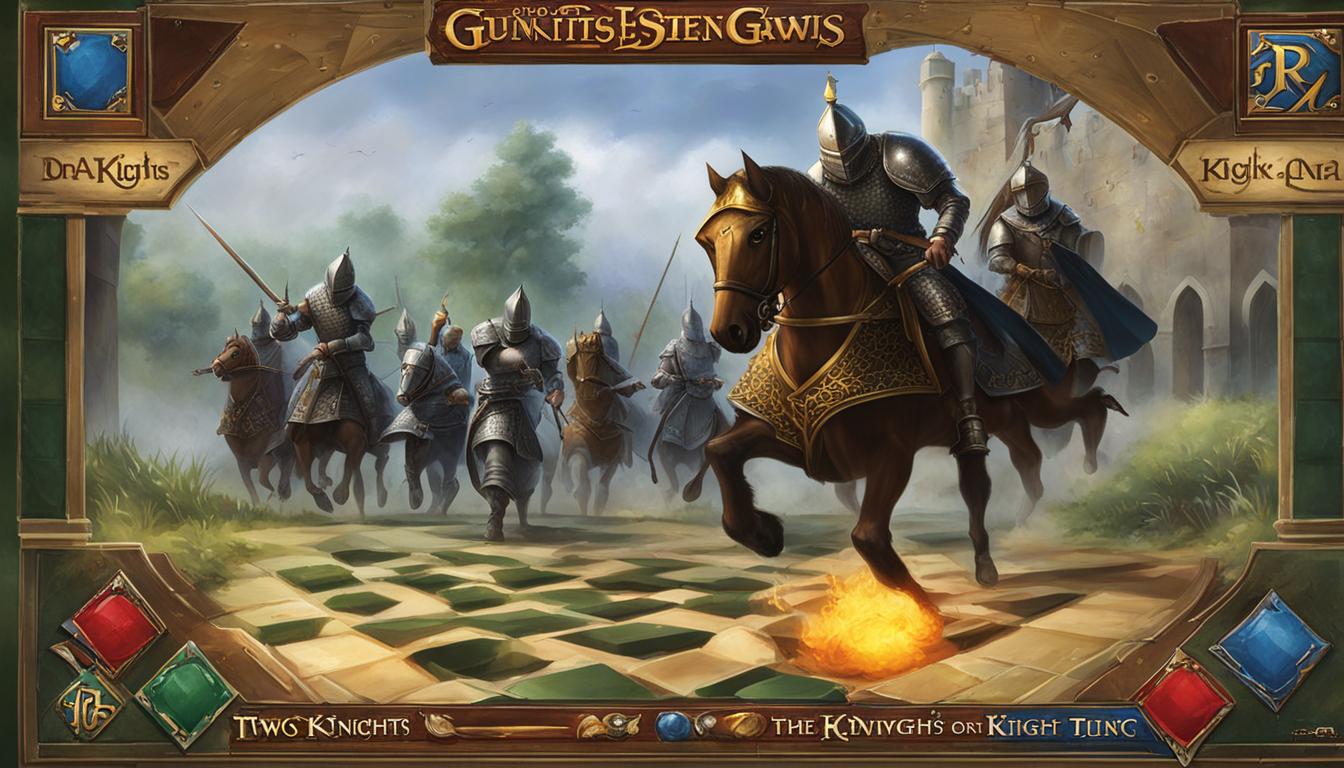
Rook vs. Two Knights: Coordination and Imbalance
When facing a rook and pawn against two knights, the coordination and imbalance of the pieces can greatly impact the outcome of the game. In this endgame, the side with the rook has the advantage due to the rook’s long-range attacking capabilities and potential to disrupt the opponent’s piece coordination. By strategically trading the opponent’s rook, the rook player can further destabilize the opposing side.
Creating a passed pawn can be a powerful strategy for the player with the rook. By advancing the pawn, it forces one of the opponent’s knights to deal with the potential threat, potentially diverting its attention from coordinating with the other knight. This can create vulnerabilities that the rook can exploit to invade the opponent’s camp and put pressure on their position.
However, it is important to note that the specific position and factors such as piece activity and the danger posed by the pawns play a crucial role in determining the outcome. While the rook has the advantage, effective piece coordination and cautious pawn management by the side with the two knights can make it challenging for the rook to convert its advantage into a win. Each move must be carefully considered to maintain the balance or tilt it in favor of the rook player.
| Advantages | Disadvantages |
|---|---|
| Long-range attacking capabilities of the rook | Limited mobility of the two knights |
| Potential to disrupt opponent’s piece coordination | Rook can be vulnerable to knight forks |
| Ability to create passed pawn and divert opponent’s attention | Cautious pawn management critical for knight side |
Basic Checkmates and Pawnless Endgames
Pawnless endgames, such as basic checkmates with a king and queen, king and rook, and queen versus rook, are crucial to study in chess. These endgames require precise maneuvering and understanding of key principles to secure victory. Let’s explore some of the important concepts and strategies involved in these pawnless endgames.
King and Queen Checkmate
One of the most fundamental checkmates is the king and queen against a lone king. In this scenario, the king and queen work together to trap the opposing king in a corner of the board. By utilizing the queen’s long-range power and the king’s support, the attacking side can force checkmate. It is important to remember the basic checkmating patterns and avoid stalemate situations.
King and Rook Checkmate
The king and rook checkmate is another essential pawnless endgame to master. With the help of the rook’s mobility and the king’s assistance, the attacker aims to corner the opposing king and deliver checkmate. Various setups and patterns exist for achieving this checkmate, and studying them can enhance your endgame skills and increase your chances of success.
Queen versus Rook
Lastly, the endgame of queen versus rook presents unique challenges and opportunities. The queen possesses greater attacking power, but the rook’s defensive capabilities and the potential for stalemate can complicate matters. Evaluating the position and understanding the strengths and weaknesses of each piece are critical in guiding your decision-making process. Precise calculation and careful maneuvering can lead to victory or a drawn result.
| Endgame | Description |
|---|---|
| King and Queen vs. King | A basic checkmate with a king and queen against a lone king. The attacking side uses the queen’s power to corner and checkmate the opposing king. |
| King and Rook vs. King | An important checkmate that involves utilizing the rook’s mobility and the king’s support to trap and checkmate the opposing king. |
| Queen vs. Rook | A complex endgame where the queen’s attacking power clashes with the rook’s defensive capabilities. Accurate evaluation and calculation are crucial. |
Rook versus a Bishop or Knight: Fortresses and Drawish Nature
The endgame scenario of a Rook versus a Bishop or Knight often leads to a draw due to the defensive capabilities of the minor pieces. However, there are specific positions where the defending player can establish a fortress and secure a draw. This occurs when the stronger side is unable to break through the defensive setup, most commonly when the trapped King is in a corner of the same color as the Bishop. In such cases, the Bishop acts as a powerful shield, making it challenging for the Rook to infiltrate and deliver a checkmate.
Even in Rook and Bishop versus Rook endgames, where the Rook and Bishop combination can still have winning chances, setting up a fortress remains a viable strategy for the defensive side. The goal of the defending player is to restrict the mobility of the opponent’s Rook, making it difficult to launch effective attacks. By carefully coordinating the movements of the Bishop and King, the player with the minor pieces can often achieve a draw.
Despite the generally drawish nature of the Rook versus Bishop or Knight endgame, it is important for players to approach these positions with caution. The side with the Rook should be patient and look for potential weaknesses in the opposing forces. Conversely, the side with the Bishop or Knight should focus on maintaining a solid defensive structure while seizing any opportunities to exploit the opponent’s mistakes. The ability to recognize fortress-like positions and skillfully defend them can significantly impact the outcome in these intriguing endgames.
Table: Examples of Rook versus Bishop or Knight Fortress Positions
| Position | Description |
|---|---|
| A defensive fortress created with the King trapped in the corner of the same color as the Bishop, preventing the Rook from delivering a checkmate. | |
| A fortress position where the Knight blocks the Rook’s access to crucial squares, making it difficult for the Rook to penetrate the defense. |
Rook and Minor Piece versus Rook: Defensive Methods and Winning Chances
When it comes to the endgame scenario of a rook and minor piece versus a rook, defensive methods are crucial for the side with the lone rook. While this endgame is technically a theoretical draw, the dynamic coordination between the rook and the minor piece provides great winning chances in practice. To defend effectively, two key defensive methods can be employed: the Cochrane Defense and the “second rank defense”.
The Cochrane Defense aims to exploit the vulnerability of the opposing rook to back-rank checkmates. By placing the rook behind the enemy’s pawns, it becomes more difficult for the rook and minor piece to coordinate effectively. This defensive strategy forces the opponent to be cautious and creates opportunities for counterplay.
| Defensive Method | Description |
|---|---|
| Cochrane Defense | Placing the rook behind the enemy’s pawns to exploit back-rank vulnerabilities and limit coordination with the minor piece. |
| “Second Rank Defense” | Maintaining the rook on the second rank to prevent the opponent’s rook from infiltrating and compromising the defense. |
The “second rank defense” revolves around keeping the rook on the second rank to prevent the opponent’s rook from infiltrating and disrupting the defense. By maintaining a strong second rank defense, the side with the rook and minor piece can neutralize potential threats and maintain active counterplay.
It is important to note that in specific positions, such as the well-known Philidor position, the side with the rook and minor piece can achieve a winning advantage. The Philidor position involves the defending king being positioned on the fifth or sixth rank, allowing the rook and minor piece to create mating threats. By optimizing the coordination between the rook and the minor piece and exploiting positional weaknesses, the side with the rook and minor piece can secure victory.
In conclusion, while the endgame of rook and minor piece versus rook is theoretically a draw, the defending player can adopt defensive methods such as the Cochrane Defense and the “second rank defense” to increase winning chances. These methods exploit vulnerabilities in the opponent’s position and limit their piece coordination. Additionally, in specific positions like the Philidor position, the side with the rook and minor piece can potentially achieve a winning advantage. By understanding and applying these defensive methods, players can navigate this endgame with confidence and increase their chances of success.
Rook and Minor Piece versus Rook and Minor Piece: Balance and Complexity
The endgame featuring a rook and minor piece against a rook and minor piece is a highly intricate and finely balanced situation. Both sides possess their own advantages and must employ specific strategies to gain an edge. While material count may provide a general indication, it can often be misleading. Therefore, factors such as piece activity, coordination, and the threat posed by pawns play significant roles in evaluating these positions.
The player with the rook and minor piece should seek opportunities to trade off the opponent’s rook, as this can disrupt their coordination and potentially create winning chances. Additionally, by forcing the opponent’s minor piece to deal with a passed pawn, the player can increase their winning prospects. However, it is crucial to assess the specific position and consider the activity of the pieces and the danger posed by the pawns in order to make accurate decisions.
To illustrate the complexity and balance of this endgame, consider the following table:
| Rook and Minor Piece | Rook and Minor Piece | |
|---|---|---|
| Advantages | – Increased coordination | – Possibility to invade opponent’s camp |
| Strategies | – Aim to trade opponent’s rook | – Force opponent’s minor piece to deal with passed pawns |
| Disadvantages | – Potential for trapped pieces | – Limited winning chances without accurate piece coordination |
As demonstrated in the table, both sides possess their own advantages and face unique challenges. The rook and minor piece must capitalize on their increased coordination and the potential to invade the opponent’s camp. Meanwhile, the opposition must be wary of trapped pieces and the limited winning chances in the absence of precise piece coordination.
Considering the intricate nature of this endgame, players must carefully evaluate the position and employ strategic thinking to gain an advantage. By effectively trading rooks and utilizing passed pawns, the player with the rook and minor piece can create winning opportunities. However, it is crucial to remember that accurate assessment of the position, piece activity, coordination, and the danger posed by pawns are vital components in making informed decisions and achieving success.
Summary and Application of Principles
In the previous sections, we have explored various endgame scenarios involving a rook and minor piece. Now, let’s summarize the essential principles we have learned and discuss their application in evaluating and making strategic decisions in these endgames.
First and foremost, maintaining piece activity is crucial. Keeping your rook and minor piece active on the board allows you to apply pressure, create threats, and seize control of key squares. Look for opportunities to coordinate your pieces effectively to maximize their potential.
Trading rooks can often be advantageous in rook versus minor piece endgames. By eliminating the opponent’s rook, you disrupt their piece coordination and create imbalances that can work in your favor. Remember to evaluate each position carefully, considering factors such as piece activity, coordination, and the danger posed by pawns.
Another key principle is the creation of passed pawns. A passed pawn can become a powerful weapon, diverting the attention of the opponent’s minor piece and potentially leading to a winning advantage. Strategically advance your pawns while being mindful of potential weaknesses they may create.
By applying these principles, you can better evaluate your position and make informed decisions in rook versus minor piece endgames. Remember, each situation is unique, and the evaluation of material count alone may not provide an accurate assessment. Take into account the specific factors and dynamics at play in the position to guide your strategy and increase your chances of success.
FAQ
What are some strategies and tactics to consider in a chess game with Rook and Rook Pawns vs. Rook and Two Knights?
Evaluating the position, maintaining piece activity and coordination, and creating passed pawns can all be important strategies to consider.
How do you evaluate a position with Rook and Rook Pawns vs. Rook and Two Knights?
Evaluating material count, piece activity, and the danger posed by pawns are crucial factors in evaluating such positions.
What are the key factors and strategies to consider in a game with a Rook vs. Bishop and Knight?
Maintaining piece activity, coordinating the minor pieces, and utilizing the rook’s potential in the endgame are important strategies to consider.
What challenges and strategies are involved in a game with Rook vs. Two Bishops?
The player with the rook should aim to trade the opponent’s bishop pair, while the player with the bishops should strive to maintain them and exploit positional weaknesses.
How can you effectively coordinate a Rook against Two Knights?
The side with the rook should aim to disrupt the opponent’s piece coordination by trading rooks and potentially invading their camp. Creating a passed pawn can also be advantageous.
What should I study in pawnless endgames?
It is crucial to study basic checkmates with a king and queen, king and rook, and queen vs. rook. These endgames have been studied for centuries and have well-established principles.
Can a Rook vs. Bishop or Knight endgame result in a draw?
Generally, a rook against a bishop or knight is a draw. However, there are specific positions where the defending player can set up a fortress and achieve a draw.
Are there winning chances for the side with a Rook and Minor Piece against a Rook?
While technically a theoretical draw, the side with a rook and minor piece often has favorable winning chances due to the difficulty in defending against their coordination.
How do you analyze a game with Rook and Minor Piece vs. Rook and Minor Piece?
Evaluating piece activity, trading rooks, creating passed pawns, and considering the danger posed by pawns are crucial in analyzing such positions.
What are the key principles and their application in Rook vs. Minor Piece endgames?
Maintaining piece activity, creating outposts, trading rooks, and creating passed pawns are key principles that guide players in evaluating their positions and making strategic choices.
What is the summary and application of principles learned throughout the article?
The article provides a summary of the key principles and their application in evaluating and making decisions in Rook versus minor piece endgames.